Configuring FreePBX to connect with Zentrunk
Overview
Zentrunk is a SIP Trunking service from Plivo that allows you to connect with fixed and mobile phones in over 200 countries. Connect your cloud or on-premise communication infrastructure to Plivo’s Zentrunk SIP Trunking service to connect to your customers easily.
This documentation provides a basic configuration to get FreePBX up and running with Plivo as the external SIP gateway.
To get started with Zentrunk using FreePBX you would need to do the following:
- Install FreePBX on your environment.
- Create a Trunk on Zentrunk using Plivo Console.
- Configure an Outbound Trunk.
- Configure the Inbound Trunk.
Installation of FreePBX
To start using Zentrunk, you would need to install FreePBX on your environment. If you already have a FreePBX instance running, you may ignore this step.
For more information on installing FreePBX, check the following official installation guides:
- Follow the instructions here to install FreePBX on Debian.
- Follow the instructions here to install FreePBX on CentOS.
- Follow the instructions here to install FreePBX on Ubuntu.
Create a Trunk on Zentrunk
You can create a trunk using Plivo Console. For more information on creating a Trunk on Plivo Console, see Getting Started with Zentrunk.
Configuring an Outbound Trunk
Configuring your Outbound Trunk involves the following steps:
- Adding a Trunk
- Adding Outbound Routes
- Configuring an Extension
- Configuring X-Lite Note: There are many softphones that you can use (for example, X-Lite, Blink for Linux, etc). In this tutorial, we will be using the X-Lite Softphone.
To add a trunk
- From your FreePBX dashboard, hover over the Connectivity menu, and then click on Trunks.
- On the Trunks page, click Add Trunk, and then click Add SIP (chan_sip) Trunk.
- On the Add Trunk page, enter the following details in the General tab:
- Trunk Name: A friendly name for the trunk (for example, demo-trunk)
- Outbound Caller ID: Caller ID for the calls placed using this trunk. This has to be in the following SIP format:
"demo" <phone-number>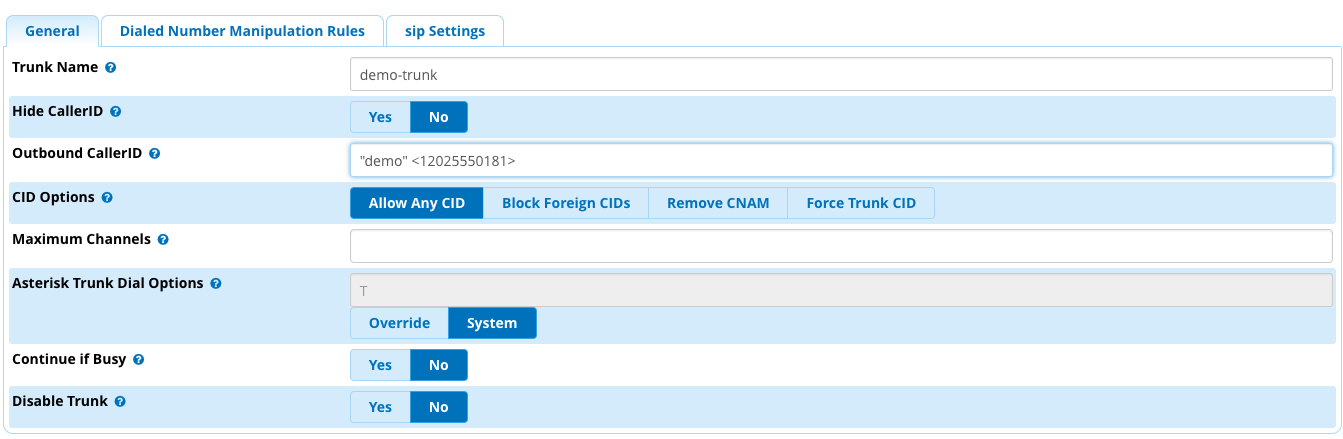
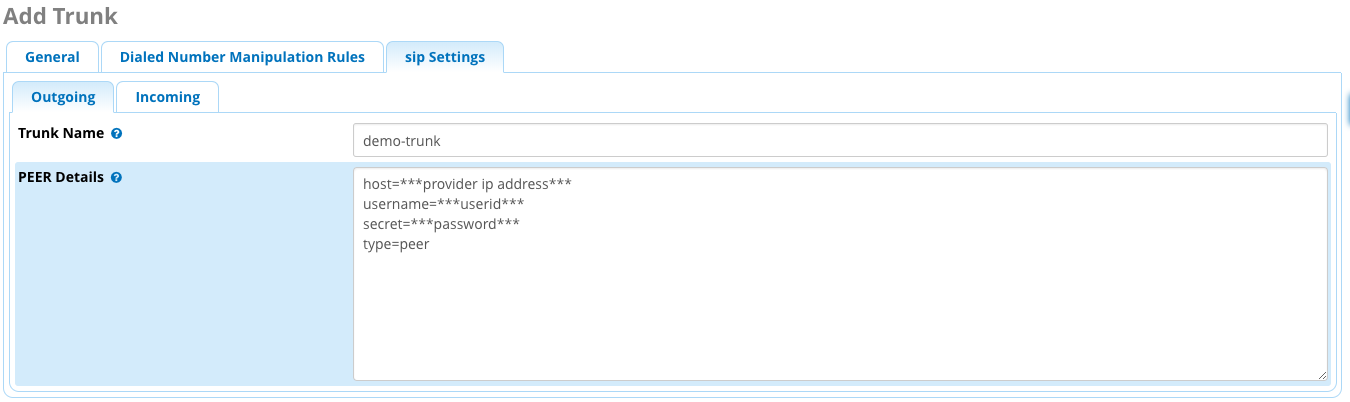
- Next, enter the following details in the sip Settings tab:
- Host - Termination SIP Domain of your Plivo Trunk
- Username - Username for TestAuthGroup
- Password - Password for TestAuthGroup
- Peer - Creates a peer connection
- Add dial pattern, you can choose to match any specific digits or use “.” as a wildcard to match one or more characters.

- Enter a friendly name for the Trunk in the Trunk Name field, and then click Submit. A trunk will be created. You must now configure an outbound route to this trunk.
To add an outbound route
- From the Connectivity menu, click Outbound Routes.
- On the Outbound Routes page, click Add Outbound Route.
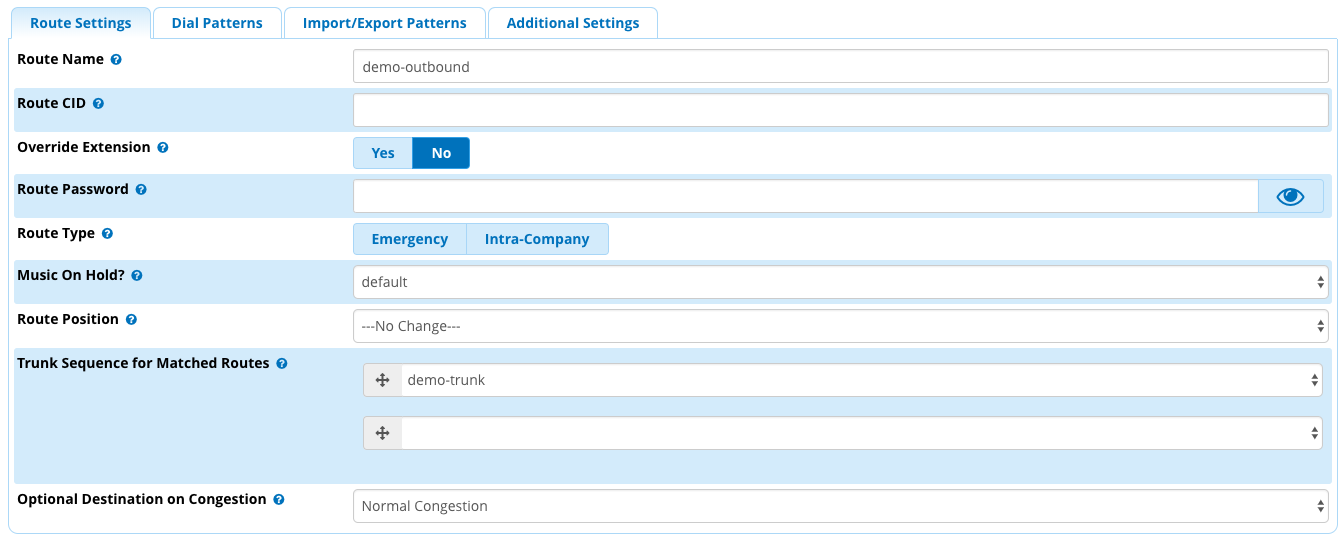
- In the Outbound Route - Add Route page, enter a friendly name for the route in the Route Name field.
- From the list of Trunk Sequence for Matched Routes, select the trunk you created in the previous section (demo-outbound).
- Next, on the Dial Patterns tab, enter the dial pattern that matches your system.
Note: You can choose to match any specific digits or use “.” as a wildcard to match one or more characters.
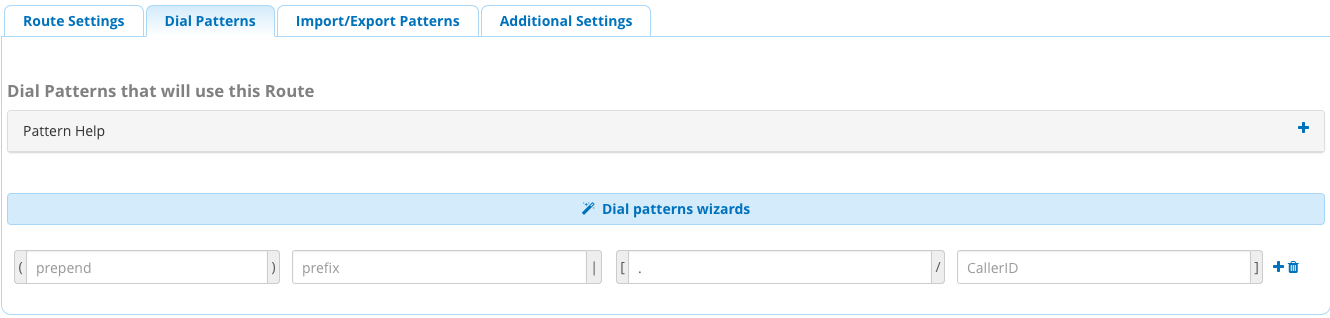
- Once you have entered your dial pattern, click Submit. The outbound route will be configured to your trunk. You must now configure an extension.
To add an extension
- From the Applications menu, click Extensions.
- On the Extensions page, click Add New Chan_SIP Extension from the Add Extension list. The Add SIP Extension page appears.
- In the General tab, enter the following details:
- User Extension - The extension number to dial to reach the user
- Display name - The callerID name for calls from this user will be set to this name
- Secret - Password configured for the device
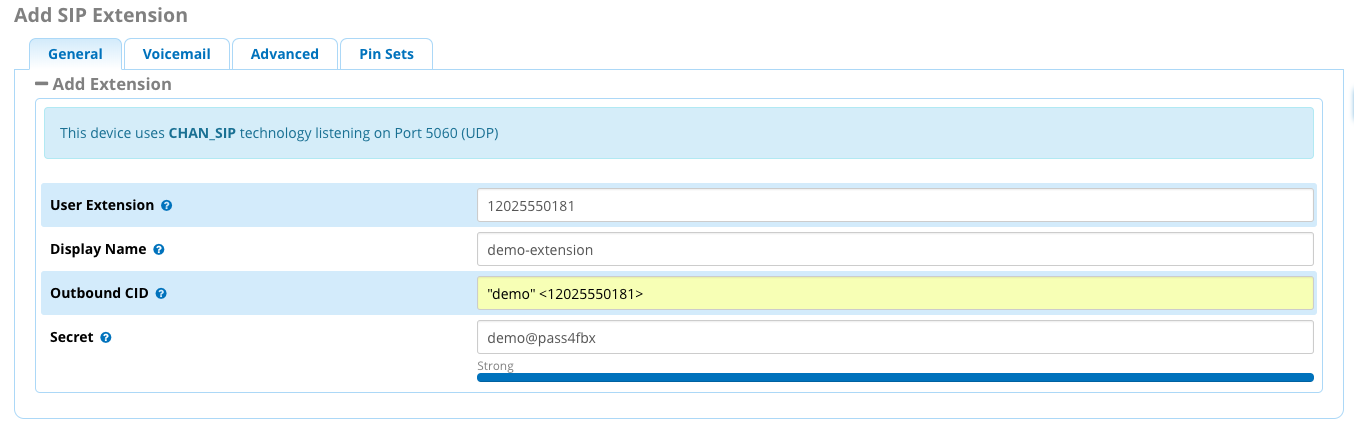
- Once done, click Submit. Your extension is created.
- On the All Extensions tab, in the Actions column, click edit for your extension.
- In the Advanced tab, under the Edit Extension section, change the configuration for NAT Mode to Yes - (force_rport,comedia).
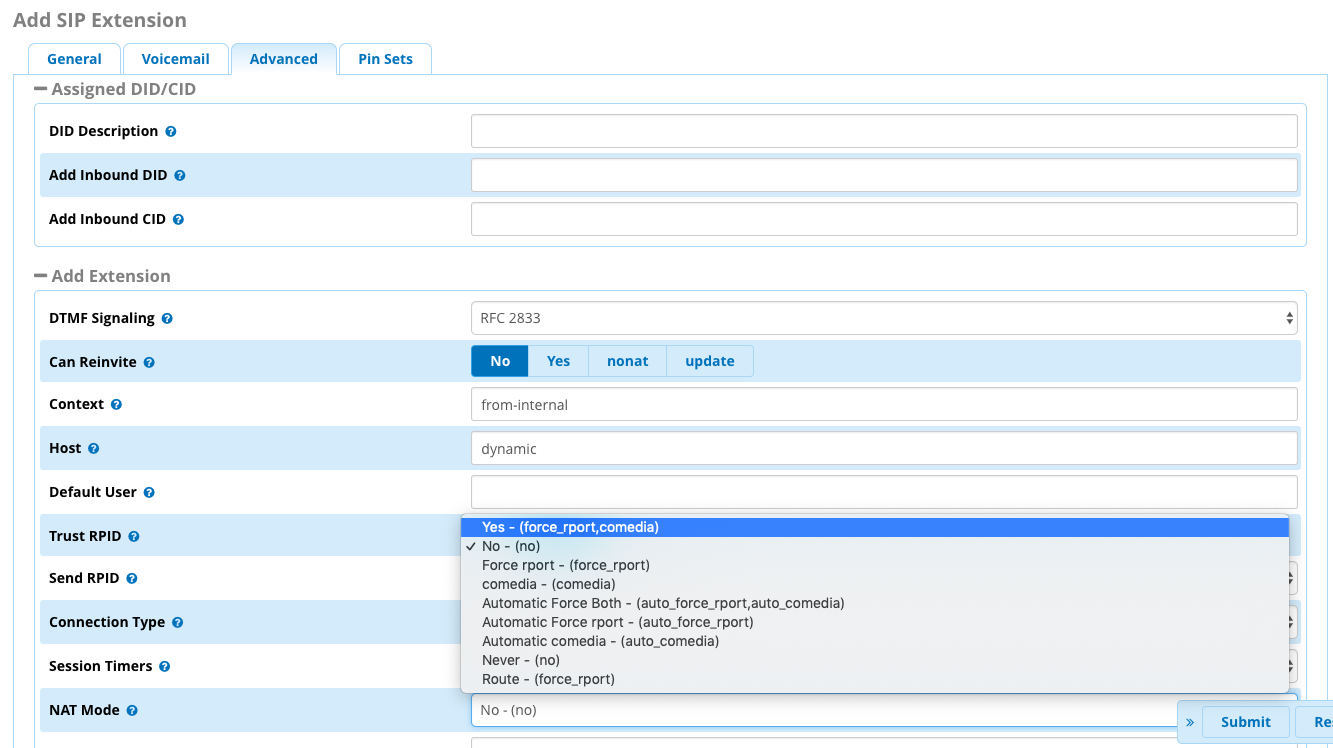
- Click Submit. Your extension will be created.
Asterisk SIP Settings
- From Setting menu, click Asterisk SIP Settings.
- Next, enter the following details in the General SIP Settings tab:
- External Address - Click on ‘Detect Network Settings’ and copy the value for future reference
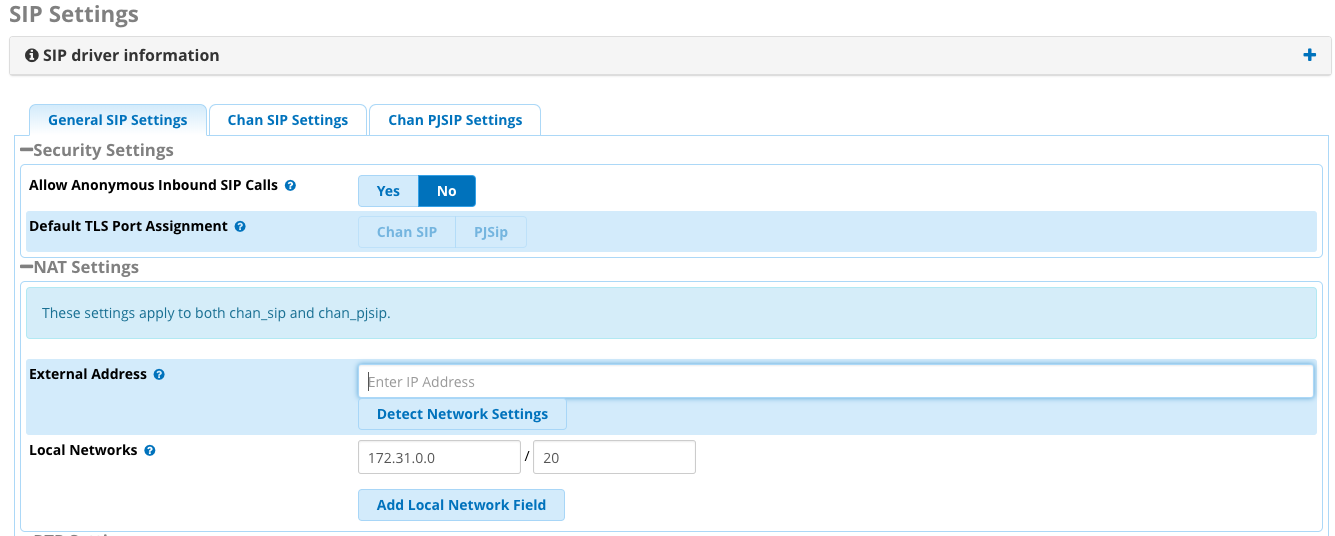
- External Address - Click on ‘Detect Network Settings’ and copy the value for future reference
- Next, enter the following details in the Chan SIP Settings tab in Advance General Settings section :
- Bind port - 5060
- TLS Bind Port - 5061
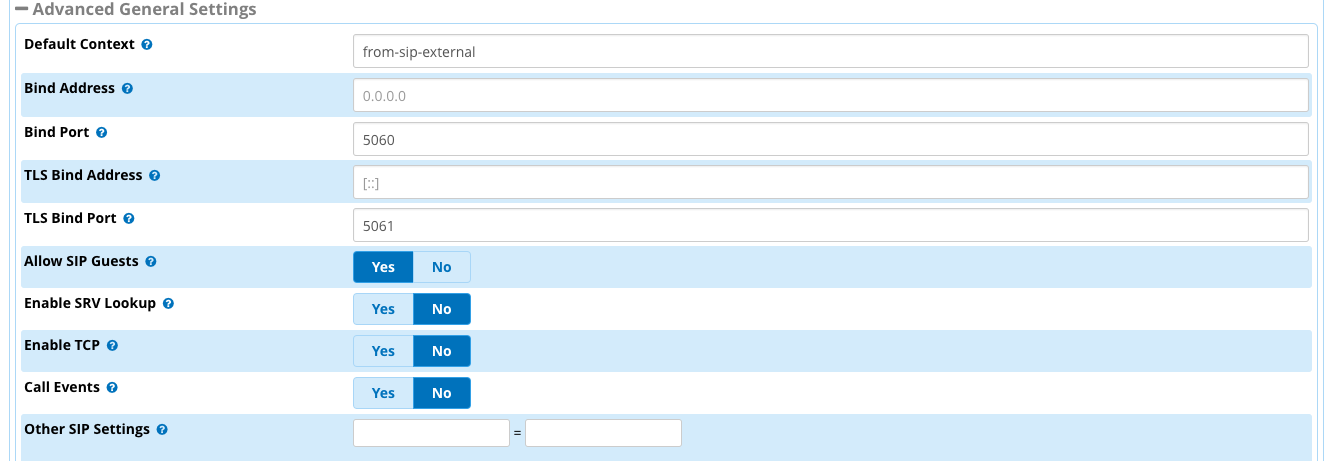
- Click Apply Config on the top navigation bar. All your configurations are complete. You can now configure X-Lite to use your Trunk. Note: In case you get an error while configuring your softphone, make sure you have clicked Apply Config on FreePBX.
Configuring an Inbound Trunk
Configuring your Inbound Trunk involves the following steps:
- Configuring an Extension
- Adding Inbound Routes
- Configuring X-Lite Note: There are many softphones that you can use (for example, X-Lite, Blink for Linux, etc). In this tutorial, we will be using the X-Lite Softphone.
To add an extension
- From the Applications menu, click Extensions.
- On the Extensions page, click Add New Chan_SIP Extension from the Add Extension list. The Add SIP Extension page appears.
- In the General tab, enter the following details:
- User Extension - The extension number to dial to reach the user
- Display name - The callerID name for calls from this user will be set to this name
- Secret - Password configured for the device
- Once done, click Submit. Your extension is created.
- On the All Extensions tab, in the Actions column, click edit for your extension.
- In the Advanced tab, under the Edit Extension section, change the configuration for NAT Mode to Yes - (force_rport,comedia).
- Addionally,check if rest of the values are configured in the below format:
- DTMF Signaling - RFC 2833
- Connection Type - friend
- Port - 5060
- Click Submit. Your extension will be created.
To add an inbound route
- From the Connectivity menu, click Inbound Routes.
- On the Inbound Routes page, click Add Inbound Route.
- In the General tab, enter the following details:
- Description - Provide a meaningful description of what this incoming route is
- DID Number - Define the expected DID Number if your trunk passes DID on incoming calls or leave it blank to match calls with any or no DID info.
- Set Destination - Select Extentions from the options. Later select the extention which was created earlier.
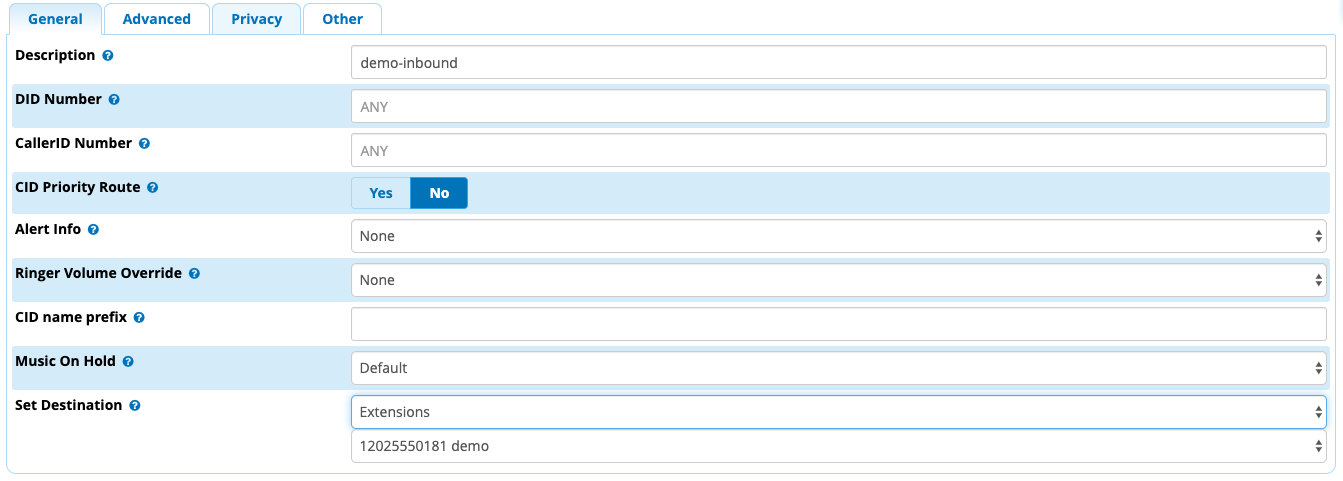
- Click Submit. Your Inbound route will be created.
Asterisk SIP Settings
- From Setting menu, click Asterisk SIP Settings.
- Next, enter the following details in the General SIP Settings tab:
- External Address - Click on ‘Detect Network Settings’ and copy the value for future reference
- External Address - Click on ‘Detect Network Settings’ and copy the value for future reference
- Next, enter the following details in the Chan SIP Settings tab in Advance General Settings section :
- Bind port - 5060
- TLS Bind Port - 5061
- Click Apply Config on the top navigation bar. All your configurations are complete. You can now configure X-Lite to use your Trunk. Note: In case you get an error while configuring your softphone, make sure you have clicked Apply Config on FreePBX.