Voice Surveys Using PHP
Overview
Plivo lets you automate voice surveys for use cases such as collecting feedback from customers and conducting polling on political issues. You can set up multiple levels of questions and walk users through different paths depending on the keys they press in response to your questions, and save the responses for analysis.
You can implement voice surveys either by using our PHLO visual workflow builder or our APIs and XML documents. Follow the instructions in one of the tabs below.
You can create and deploy a PHLO to automate voice surveys with a few clicks on the PHLO canvas, and trigger it with a few lines of code.
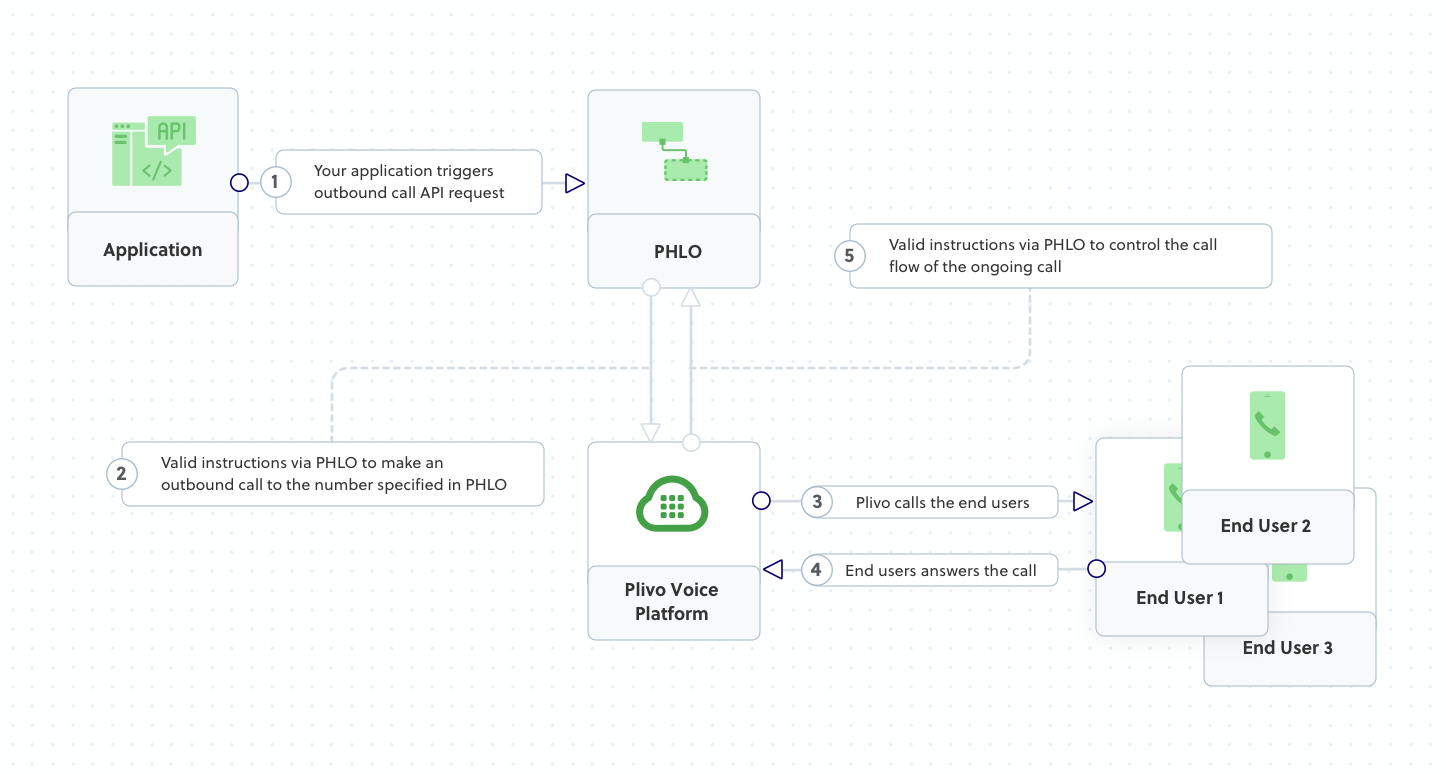
How it works

Prerequisites
To get started, you need a Plivo account — sign up with your work email address if you don’t have one already. If this is your first time triggering a PHLO with PHP, follow our instructions to set up a PHP development environment.
Create the PHLO
To create a PHLO, visit the PHLO page of the Plivo console. If this is your first PHLO, the PHLO page will be empty.
-
Click Create New PHLO.
-
In the Choose your use case pop-up, click Build my own. The PHLO canvas will appear with the Start node.
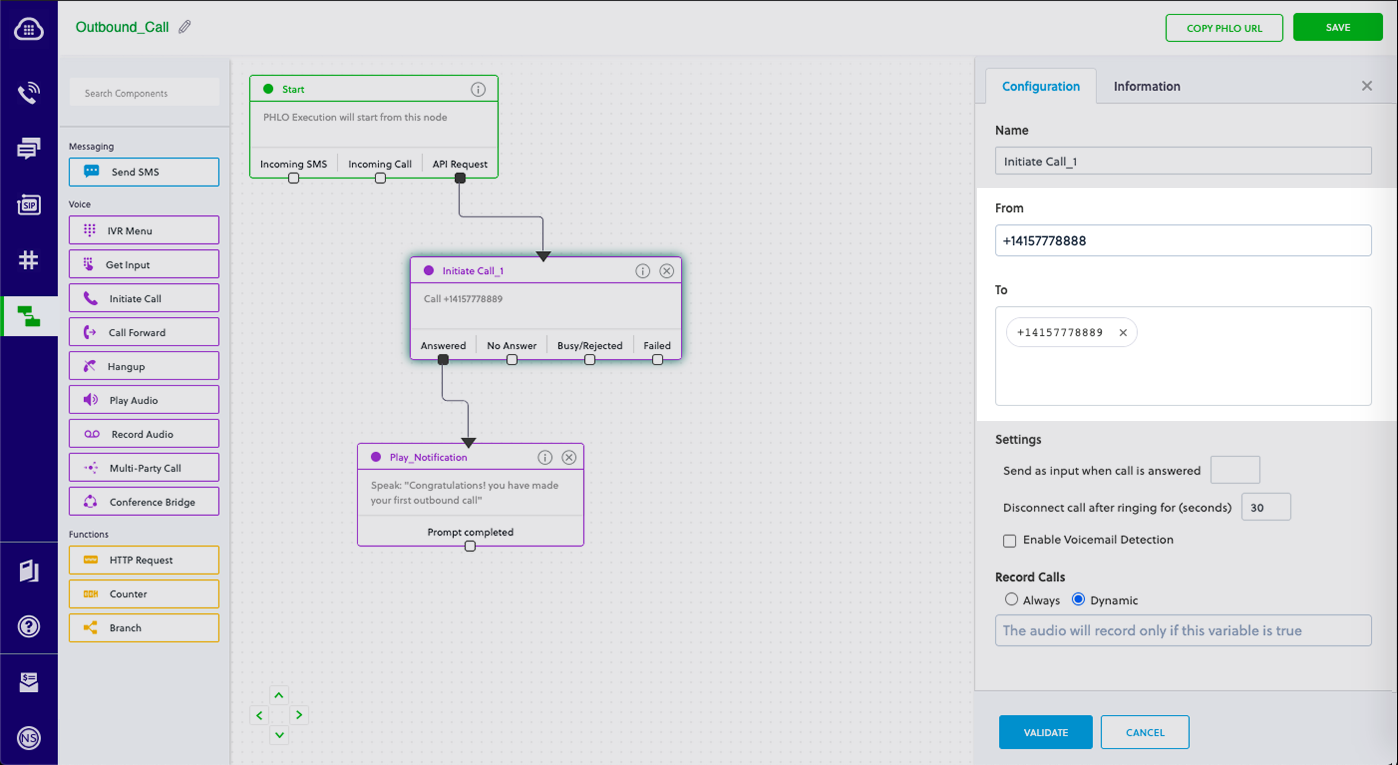
Note: The Start node is the starting point of any PHLO. It lets you trigger a PHLO to start upon one of three actions: incoming SMS message, incoming call, or API request. - Click the Start node to open the Configuration tab to the right of the canvas, then enter the information to retrieve from the HTTP Request payload. For this example, enter From and To phone numbers and your business name.
-
Validate the configuration by clicking Validate. Every time you finish configuring a node, click Validate to check the syntax and save your changes.
-
From the list of components on the left side, drag and drop the Initiate Call component onto the canvas. This adds an Initiate Call node onto the canvas. When a component is placed on the canvas it becomes a node.
- Draw a line to connect the Start node’s API Request trigger state to the Initiate Call node.
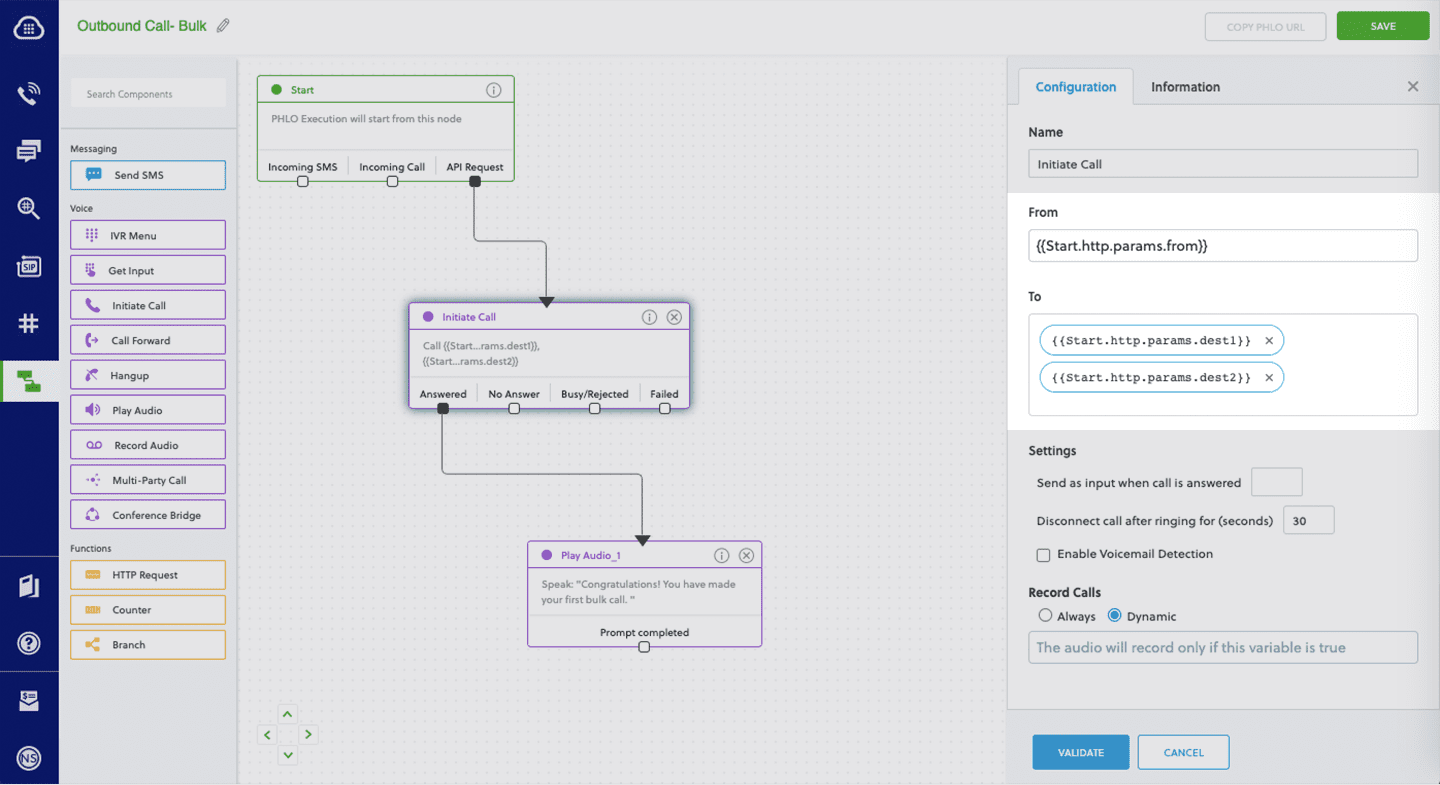
- In the Configuration tab of the Initiate Call node, rename the node to Call_Customer. You can rename nodes as you like to improve your PHLO’s readability. To enter values for the From and To fields, start typing two curly brackets. PHLO will display a list of all available variables; choose the appropriate ones. When you use variables in a PHLO, the values are retrieved from the HTTP Request payload you defined in the Start node.
- Next, drag and drop the IVR Menu component onto the canvas. Draw a line to connect the Initiate Call node‘s Answered trigger state to the IVR Menu node.
- Click the IVR Menu node to open its Configuration tab. Rename the IVR Menu node Question_1. For this example, select 1 and 2 as allowed choices. In the Speak Text box, enter a message to play to the user that introduces the survey and states the choices they can respond with. If you like, you can also configure the Language and Voice fields for the message.
-
Repeat the process with another IVR Menu node. Rename it Question_2.
- To daisy-chain to the second question after the user gives a valid response to question 1, connect the Question_1 node‘s 1 and 2 trigger states to the Question_2 node.
- Configure the choices for Question_2 on its Configuration tab. Again, select 1 and 2 as allowed choices and enter a message to play to the user.
-
Drag and drop the Play Audio component onto the canvas. Draw a line to connect the Question_2 node‘s 1 and 2 trigger states to the Play Audio node.
- In its Configuration tab, rename the node to Acknowledge_Participation. Enter a message of thanks to play to the user in the node‘s Speak Text box.
-
Drag and drop the HTTP Request component onto the canvas. Draw a line to connect the Acknowledge_Participation node‘s Prompt Completed trigger state to the HTTP Request node.
- Rename the HTTP Request node Handle_Callback. Configure the node to post the survey results to a website. On its Configuration tab, enter key names answer1 and answer2. For their values, begin typing two curly brackets to view all available variables, then select Question_1.digits and Question_2.digits.
- Give the PHLO a name by clicking in the upper left, then click Save.
Your PHLO is now ready to test.
Trigger the PHLO
You integrate a PHLO into your application workflow by making an API request to trigger the PHLO with the required payload — the set of parameters you pass to the PHLO. You can define a static payload by specifying values when you create the PHLO, or define a dynamic payload by passing values through parameters when you trigger the PHLO from your application.
With static payload
When you configure values when creating the PHLO, they act as a static payload.

Code
Create a file called TriggerPhlo.php and paste into it this code.
1
2
3
4
5
6
7
8
9
10
11
12
13
<?php
require 'vendor/autoload.php';
use Plivo\Resources\PHLO\PhloRestClient;
use Plivo\Exceptions\PlivoRestException;
$client = new PhloRestClient("<auth_id>", "<auth_token>");

$phlo = $client->phlo->get("<phlo_id>");
try {
    $response = $phlo->run();
    print_r($response);
} catch (PlivoRestException $ex) {
    print_r($ex);
}
Replace the auth placeholders with your authentication credentials from the Plivo console. Replace the phlo_id placeholder with your PHLO ID from the Plivo console.
With dynamic payload
To use dynamic values for the parameters, use Liquid templating parameters when you create the PHLO and pass the values from your code to the PHLO when you trigger it.

Code
Create a file called TriggerPhlo.php and paste into it this code.
1
2
3
4
5
6
7
8
9
10
11
12
13
<?php
require 'vendor/autoload.php';
use Plivo\Resources\PHLO\PhloRestClient;
use Plivo\Exceptions\PlivoRestException;
$client = new PhloRestClient("<auth_id>", "<auth_token>");

$phlo = $client->phlo->get("<phlo_id>");
try {
    $response = $phlo->run(["from" => "<caller_id>", "to" => "<destination_number>"]);
    print_r($response);
} catch (PlivoRestException $ex) {
    print_r($ex);
}
Replace the auth placeholders with your authentication credentials from the Plivo console. Replace the phlo_id placeholder with your PHLO ID from the Plivo console. Replace the phone number placeholders with actual phone numbers in E.164 format (for example, +12025551234).
Test
Save the file and run it.
php TriggerPhlo.php
Here’s how to use Plivo APIs and XML to implement voice surveys.
How it works

Plivo requests an answer URL when the call is answered (step 4) and expects the file at that address to hold a valid XML response from the application with instructions on how to handle the call.
Prerequisites
To get started, you need a Plivo account — sign up with your work email address if you don’t have one already. You must have a voice-enabled Plivo phone number to receive incoming calls; you can rent numbers from the Numbers page of the Plivo console, or by using the Numbers API. If this is your first time using Plivo APIs, follow our instructions to set up a PHP development environment and a web server and safely expose that server to the internet.
Create a voice survey application in PHP
Change to the project directory and run this command to create a Laravel controller.
$ php artisan make:controller SurveyController
This generates a controller named SurveyController in the app/http/controllers/ directory. Edit app/http/controllers/SurveyController.php and add this code.
1
2
3
4
5
6
7
8
9
10
11
12
13
14
15
16
17
18
19
20
21
22
23
24
25
26
27
28
29
30
31
32
33
34
35
36
37
38
39
40
41
42
43
44
45
46
47
48
49
50
51
52
53
54
55
56
57
58
59
60
61
62
63
64
65
66
67
68
69
70
71
72
73
74
75
76
77
78
79
80
81
82
83
84
85
86
87
88
89
90
91
92
93
94
95
96
97
98
99
100
101
<?php

namespace App\Http\Controllers;
require '../../vendor/autoload.php';
use Plivo\RestClient;
use Plivo\XML\Response;
use Illuminate\Http\Request;

class SurveyController extends Controller
{
    // GetInput XML to handle the incoming call
    public function ivrMain()
    {
        // Message that Plivo reads when the call recipient answers
        $Question1 = "Hi, this is a call from Plivo. How would you rate your overall satisfaction with our services? Press 1 if you're satisfied or 2 to suggest improvements";
        // Message that Plivo reads when the recipient provides negative feedback
        $NegativeFeedback = "We're sorry about your bad experience, One of our representatives will get in touch with you";
        // Message that Plivo reads when the caller does nothing
        $NoinputMessage = "Sorry, I didn't catch that. Please hang up and try again";
        // Message that Plivo reads when the caller enters an invalid number
        $WronginputMessage = "Sorry, that's not a valid entry";

        $r = new Response();

        $getinput_action_url = "https://<yourdomain>.com/firstbranch.php";
        $get_input = $r->addGetInput([
                    'action' => $getinput_action_url,
                    'method' => "POST",
                    'digitEndTimeout' => "5",
                    'inputType' => "dtmf",
                    'redirect' => "true",
                ]);
        $get_input->addSpeak($Question1);
        $r->addSpeak($NoinputMessage);
        Header('Content-type: text/xml');
        echo $r->toXML();
    }

    // Action URL block for DTMF
    public function firstBranch(Request $request)
    {
        $Question2 = "How would you rate your satisfaction with our customer service? Press 1 if you're satisfied or 2 to suggest improvements";
        // Message that Plivo reads when the recipient provides negative feedback
        $NegativeFeedback = "We're sorry about your bad experience, One of our representatives will get in touch with you";
        // Message that Plivo reads when the caller does nothing
        $NoinputMessage = "Sorry, I didn't catch that. Please hang up and try again";
        // Message that Plivo reads when the caller enters an invalid number
        $WronginputMessage = "Sorry, that's not a valid entry";

        $r = new Response();

        $digit = $_REQUEST['Digits'];
        if ($digit == '1'){
            $getinput_action_url = "https://<yourdomain>.com/secondbranch.php";
            $get_input = $r->addGetInput([
                    'action' => $getinput_action_url,
                    'method' => "POST",
                    'digitEndTimeout' => "5",
                    'inputType' => "dtmf",
                    'redirect' => "true",
                ]);
            $get_input->addSpeak($Question2);
            $r->addSpeak($NoinputMessage);
        }
        else if ($digit == '2'){
            $r->addSpeak($NegativeFeedback);
        }
        else {
            $r->addSpeak($WronginputMessage);
        }
        Header('Content-type: text/xml');
        echo $r->toXML();
    }

    // Action URL block for Sales and Support branch
    public function secondBranch(Request $request)
    {
        // Message that Plivo reads when the recipient provides negative feedback
        $NegativeFeedback = "We're sorry about your bad experience, One of our representatives will get in touch with you";
        // Message that Plivo reads when the caller enters a wrong number
        $WronginputMessage = "Sorry, that's not a valid entry";

        $r = new Response();
        $digit = $_REQUEST['Digits'];
        if ($digit == '1'){
            $body = "Thank you for participating in the survey";
            $params = array(
                'language' => "en-GB"
            );
            $r->addSpeak($body,$params);
        }
        else if ($digit == '2'){
            $r->addSpeak($NegativeFeedback);
        }
        else {
            $r->addSpeak($WronginputMessage);
        }
        Header('Content-type: text/xml');
        echo $r->toXML();
    }
}
Replace the auth placeholders with your authentication credentials from the Plivo console. Replace the phone number placeholders with actual phone numbers in E.164 format (for example, +12025551234).
Add a route
Add a route for the forward function in the SurveyController class. Edit routes/web.php and add these lines.
Route::match(['get', 'post'], '/survey', 'SurveyController@ivrMain');
Route::match(['get', 'post'], '/firstbranch', 'SurveyController@firstBranch');
Route::match(['get', 'post'], '/secondbranch', 'SurveyController@secondBranch');
Start the Laravel server.
$ php artisan serve
You should see your basic server application in acation at http://localhost:8000/survey.
Set up ngrok to expose your local server to the internet.
Test
Make a call to a Plivo phone number and see how the survey application works.
